DIY strip foundation: step by step instructions and photos
TO The most popular types of support structures include a strip-type foundation. It is practical and affordable. It is not so difficult to organize a strip foundation with your own hands: step-by-step instructions will help you do it correctly and efficiently. Having started the installation work, it is worth learning about the construction technology, and also considering all the important characteristics of this foundation.
The content of the article [Hide]
- 1 Features of the tape-type foundation: pros and cons
- 2 DIY strip foundation: step-by-step instructions and installation nuances
- 3 Calculator for calculating the amount of gravel-sand mixture for the foundation cushion
- 4 Calculator for calculating the amount of solution for a strip foundation
- 5 How to choose a concrete grade for a strip structure?
- 6 Helpful hints
- 7 Video: practical advice on the construction of a tape-type foundation
Features of the tape-type foundation: pros and cons
A strip foundation is a cast strip created from a concrete mixture. The base is made under the supporting structures and internal partitions.
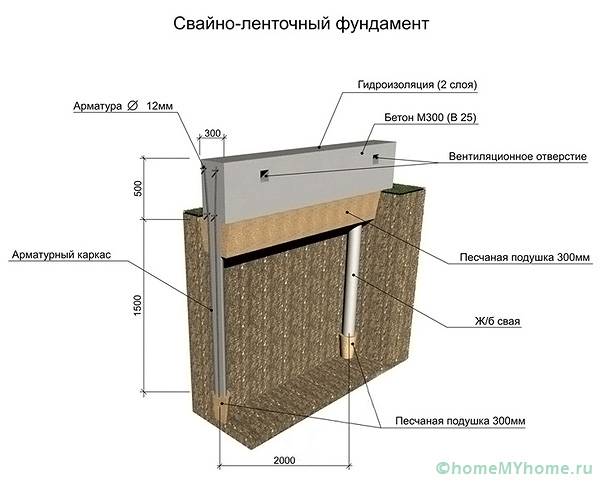
Such a support structure is recommended for solid and bulky construction objects made of concrete or bricks... Also used for structures with heavy slabs. A strip base is used for buildings with different loads. In this case, the height of the base may vary. If buildings of small height are being erected or frame houses, and the soil is weakly loose, then a shallow type of base is used.
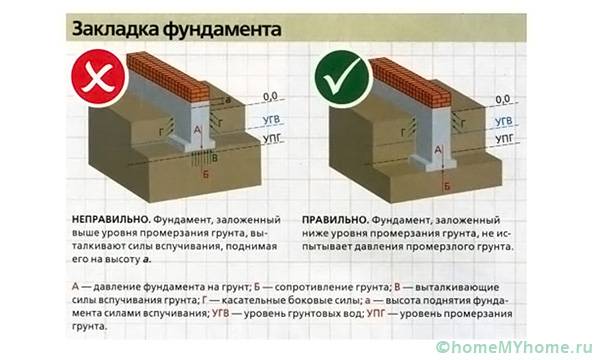
If the soil is characterized by heterogeneity, then a deeply buried foundation is used. The base height is calculated based on the freezing of the soil layer during cold periods.In order to correctly and efficiently do the strip foundation with your own hands, step-by-step instructions involve taking into account the size of the walls of the future structure, the properties of the soil layer and the depth of passage of groundwater.
The tape base has the following advantages:
- ease of installation work;
- long service life;
- the ability to withstand the highest loads;
- during construction, you do not need to use special equipment;
- choice of the type of foundation for certain financial capabilities.
This design also has certain disadvantages:
- it cannot be used for some types of soil;
- a significant amount of raw materials used.
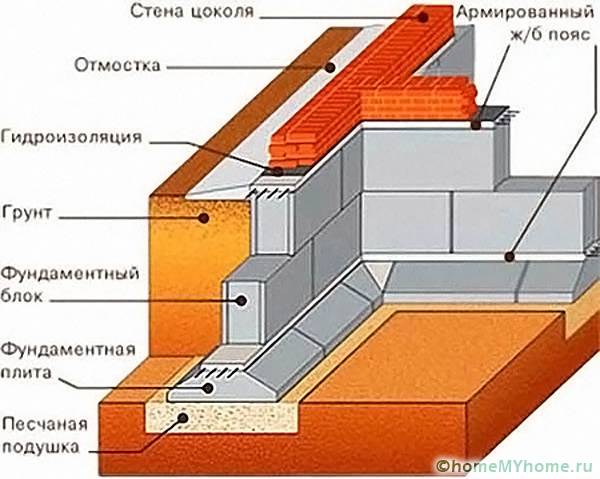
Step-by-step instructions and high-quality video will help you create a high-quality strip foundation with your own hands. Such structures can be monolithic, and prefabricated structures are also used. A monolithic base is poured over the entire site with concrete. The prefabricated system consists of separately poured elements that are assembled later.
DIY strip foundation: step-by-step instructions and installation nuances
How to build a strip foundation with your own hands will allow you to find out step-by-step instructions and detailed photos. At the same time, the arrangement of the base is considered a zero cycle of construction work, which involves the preparation of the site, leveling the territory and cleaning up disturbing trees and shrubs.
Preparatory work: project and high-quality markup
Before construction work, design work is carried out, as well as geodesy surveys. In this case, it is necessary to determine the structure of the soil, the depth of soil freezing and the passage of deep waters. At the stage of preparatory work, the site is cleared and the relief surface is leveled. Under construction canopy for storage of building materials. The area is marked in accordance with the drawings. In this case, wire or rope is used, and reinforcement can be selected as pegs.
First, two pegs are installed, from which the wires are pulled. At the point where they intersect, a fourth vertex is created. The lines are then measured for the inner boundaries of the structural walls. The width of the foundation is equal to the thickness of the walls plus finishing materials. Additional constructions must be taken into account: veranda, porch or fireplace. Height levels are also adjusted. Special strips are installed along the perimeter. With the help of the level, the rope is pulled on them and the value of the height differences is adjusted.
Features of earthworks
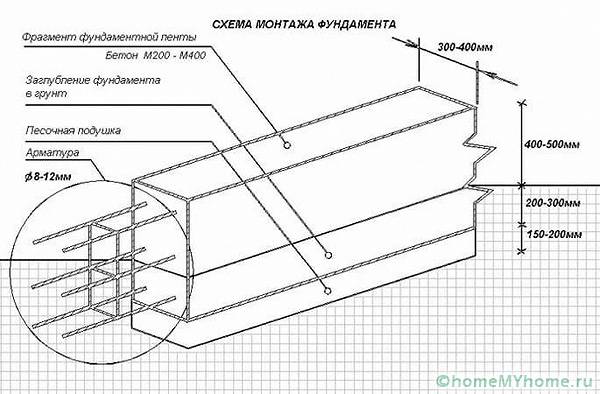
The laborious processes in the construction of the foundation include the creation of a deep trench. It will help you dig the necessary recess under the strip foundation with your own hands - step by step instructions, photos of the work are presented below. The height of the dug hole depends on the type of soil. For the sandy, a trench is pulled out to a depth of about a meter. For light loamy composition - about 1.25 m, and for clay soil more than one and a half meters.

It is necessary that the width of the trench corresponds to the dimensions of the planned foundation
Walls need to be made vertical, this can be controlled with an overhang. Sand and gravel cushions must be created for cushioning. For this, a layer of sand is laid, which is necessarily moistened, and a gravel-crushed stone layer.
Calculator for calculating the amount of gravel-sand mixture for the foundation cushion
How to make a solid formwork?
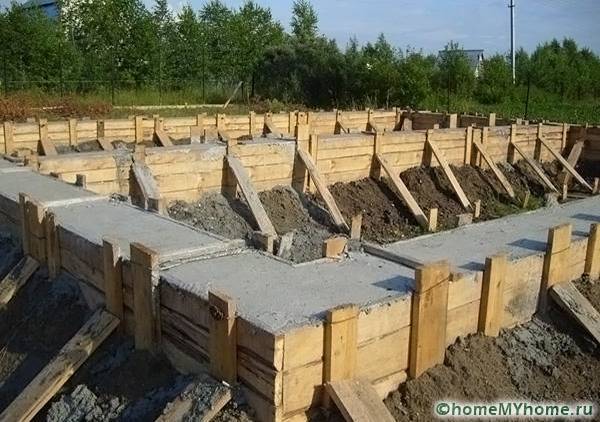
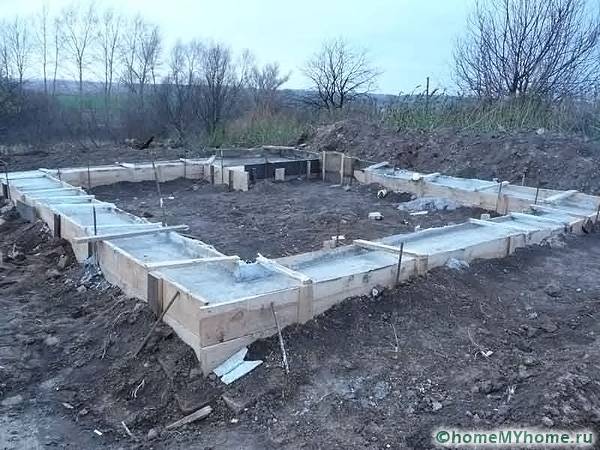
For the assembly of the mold, a panel board made of wood is used. In this case, edged boards are selected. The walls of the formwork are made above the level of the future foundation. This is to ensure that the mixture does not overflow. Shields are assembled from edged boards, and then mounted to supports that are installed along the edges of the trench. Holes are made in the formwork for sewer lines.
To mark the level of filling, a cord is pulled, which should rise above the ground above a level of 30 cm. A layer of waterproofing is also laid. For these purposes, roofing material or geotextiles can be used.
Laying reinforcement and pouring the foundation
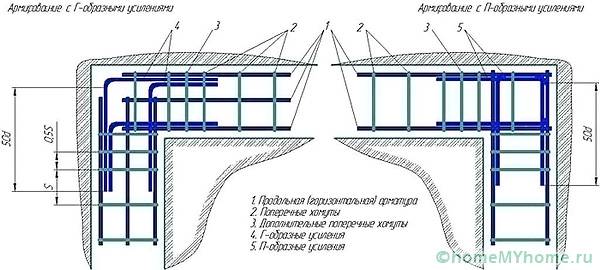
It will allow you to perfectly make a strip foundation with your own hands - step-by-step instructions, which describe in detail how to make reinforcement. This stage is needed to create a reliable and durable frame.
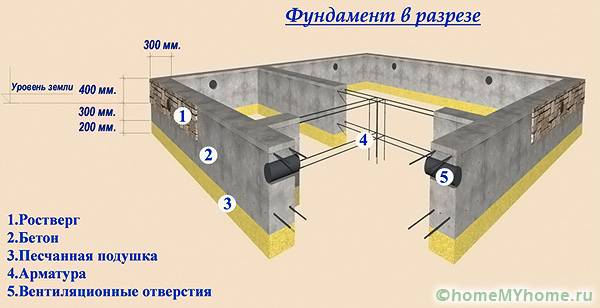
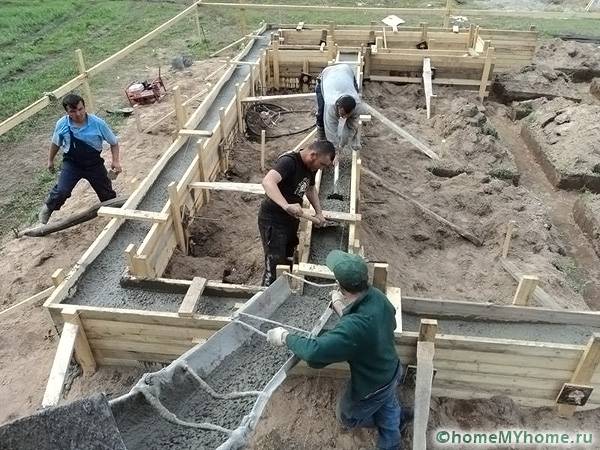
The installation of the reinforcement frame is carried out together with the laying of the formwork. Iron rods are installed with an interval of 12-25 cm. To them reinforcement elements are mounted using wire... A special pipe can be attached to the fittings to provide natural ventilation. The foundation is being poured. Special paper is laid along the walls of the formwork. The concrete mix is poured into the frame in layers. Moreover, each layer must be pierced so that air can escape.
The technology is carried out in several stages:
- before work, it is worth checking the density of the mixture, which should have a homogeneous structure;
- after pouring the solution, it must be tamped. To do this, use a special tool with vibrating properties, then use a trowel to level the surface;
- the concrete mixture hardens for about three weeks. If the work is carried out in hot weather, then it is necessary to periodically moisten the surface in order to prevent cracking of the material.
Calculator for calculating the amount of solution
When pouring, it is recommended to use a special gutter-shaped tool. The construction of walls is allowed in 16-25 days.
How to choose a concrete grade for a strip structure?
It is worth choosing a suitable brand of concrete before creating a pile-strip foundation with your own hands: step-by-step instructions will help you do this. The following options are worth considering:
- for a shallow foundation, materials of the M100 - M150 brand are suitable, but with a shallow passage of groundwater, it is worth choosing the M250 brand;
- for a recessed version, you should prefer the M200 or M250 brands;
- when creating a foundation for heavy structures, it is recommended to use materials of the M300 or M350 brands.
Related article:
Helpful hints
When installing a strip foundation, you must determine the quality of the soil in advance. It is worth paying attention to the quality of the roads that lead to the house. If they are uneven and in dips, then the soil will be heterogeneous. It is also worth paying attention to the neighboring buildings. Are there any cracks on them?
If the soil is homogeneous, but clay layers are present in several places, then you can dig a trench deeper and sprinkle it with sand. The strip foundation can be produced on your own, if you take into account its properties and strictly follow the sequence of installation work.
Video: practical advice on the construction of a tape-type foundation


