External retro wiring - design and technical features
At the dawn of domestic use of electricity, all cables were laid in an open way, and all electrical fittings were also attached to the surface of the walls. Now this option of laying is called retro wiring and is used mainly for the functional decoration of some interior styles... This article will provide information about the components made in retro style and their manufacturers, as well as about the features of external installation of electrical wiring in wooden house, brick and concrete structures. An overview of prices for work and feedback on operation is given.
The content of the article [Hide]
- 1 External retro wiring - design techniques and features
- 2 Advantages and Disadvantages of Retro Wiring
- 3 Retro style wiring - accessories with photos in the interior
- 4 DIY installation of open wiring in retro style
- 5 Design project of retro wiring in a wooden house and apartments with photos of interiors
- 6 Retro wiring: reviews
- 7 Retro wiring installation - price per work
- 8 Summing up
External retro wiring - design techniques and features
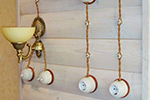
First of all, you should correct the misconception that retro wiring is performed exclusively with an open cable. Laying in electrical pipes made of painted metal and copper-like plastic is allowed. Such pipes, in addition to decorative, also perform a protective function. In addition, they make it possible to use a regular cable. This method of external laying is used in scandinavian style (wood interior decoration) or loft (brick and concrete walls). Also, according to the requirements of the PUE, cable laying in pipes is carried out in rooms with high humidity: bathrooms, showers, saunas, etc.
Antique open cable laying is typical for interior Provence styles, country and shabby chic. In addition, some elements of vintage wiring, such as sockets, switches and external junction boxes, are also used for concealed installation in Art Nouveau and Victorian styles.
Advantages and Disadvantages of Retro Wiring
Before deciding on the use of external retro wiring, you should find out about its advantages and disadvantages:
Of the negative aspects of retro wiring, the user should be aware of the following:
Retro style wiring - accessories with photos in the interior
Retro wiring, especially in a wooden house, requires a more thorough approach to fire and electrical safety. When buying cables and accessories, you need to pay attention not only to design and external data, but also to quality, manufacturability and reliability of performance. It is most advisable to purchase products from branded manufacturers. Leading products of Italian companies:
Russian manufacturers are much less represented. Worthy companies include Lindaswhose products are not inferior in quality to elements of retro wiring Bironi... Chinese goods are widely represented, but the quality of their products leaves much to be desired. The most worthy (albeit mediocre) reviews were awarded to products Salvador.
It is advisable to purchase the necessary materials from one manufacturer. For example, Lindas offers pre-assembled kits:
- PHOTO: rs-electro.ru
- PHOTO: rs-electro.ru
- PHOTO: rs-electro.ru
- PHOTO: rs-electro.ru
- PHOTO: rs-electro.ru
- PHOTO: rs-electro.ru
Twisted retro wire
The cable for retro wiring is produced in the form of stranded copper wires with a cross section of 1.5 and 2.5 mm². Other types of sections are very rare. The wires are polymer-insulated from the following materials:
The outer decorative insulation (braid) is made of technical cotton or silk. Brand manufacturers impregnate the braid with fire retardant compounds or fill it with varnish.A wide range of colors and patterns on the surface of the wiring are very diverse, which allows you to choose the right option for any design solution.
Retro sockets and switches for open wiring
Sockets - overhead, often have special installation frames (1-3 places) made of wood, plastic "metal" or ceramics. For devices that are often used, it is best to use ceramic, as they prevent heat.

The switches have several options for mechanisms:
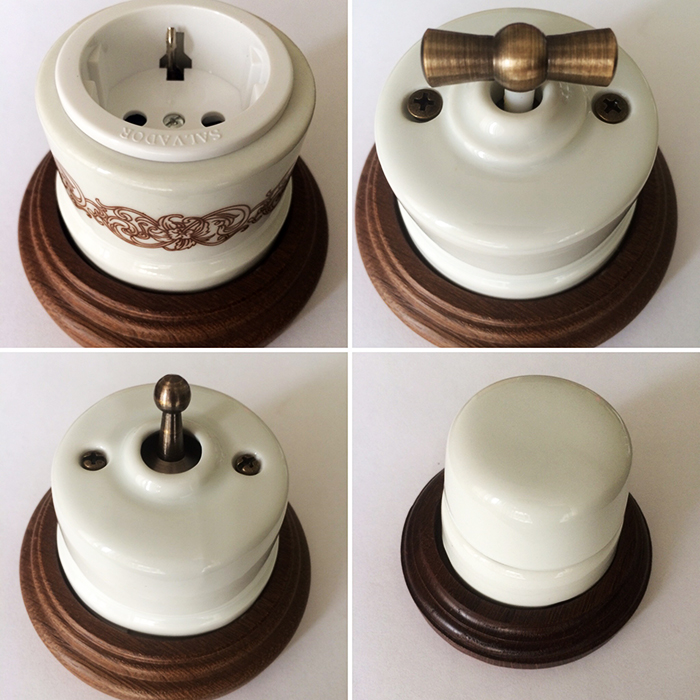
Typically, sockets, switches and junction boxes are selected from the same collection
PHOTO: retro-rosette.rf
Related article:
Terminal blocks and junction (soldering) boxes
Junction boxes are used to switch wires and greatly reduce the number of wires. Otherwise, you would have to pull a wire from the terminal block to each electrical appliance or outlet. The overall dimensions of the junction boxes vary:
Holders, passages and rollers (insulators) for retro wiring
Outdoor retro wiring in a wooden house is fixed to the walls with special insulators. They look like small relief cylinders with a base diameter of 18-22 mm and a height of 18-24 mm. The upper part - the "head" can be narrow for mounting a two-core cable and wide for a three-core cable. Manufacturing material - plastic or porcelain. Wall mounting is carried out through a hole in the center with regular or decorative screws.
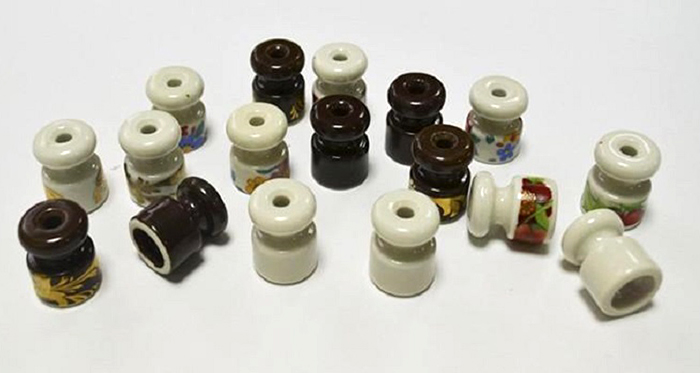
Rollers are produced in different colors, often complete with other elements of electrical accessories
PHOTO: razvodka.net
Passages refer to decorative and protective electrical elements. They represent a decorative sleeve with a collar covering the hole through which the cable is led out of the wall. Manufacturing material - porcelain.
Vintage cartridges are made from brass, aluminum alloys, copper, carbolite or metal-painted polymer materials. As a rule, their design provides for a switch, as well as technological holes, threads and washers for fastening lampshades etc.
Lighting fixtures in vintage style
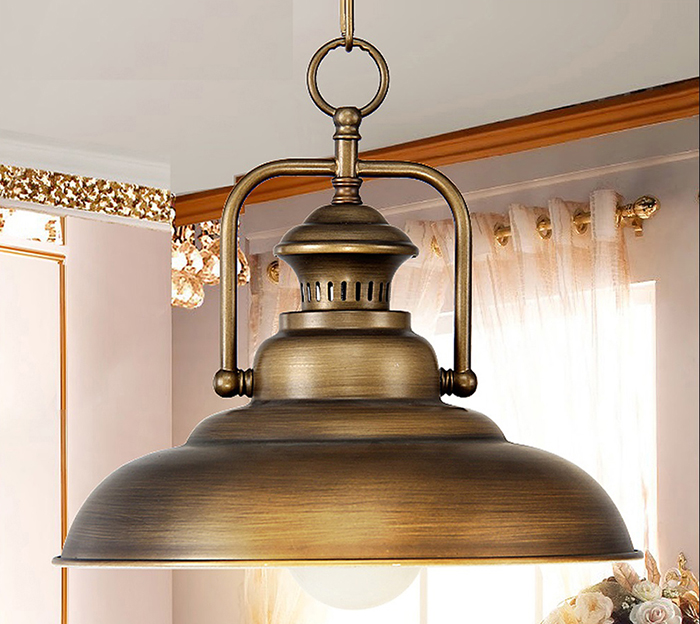
Professional designers, when developing a retro interior, as a rule, create original lighting fixtures. You can try to create them yourself, combining vintage sockets and decorative light bulbs with unusual shapes with a base. An electric cable fixed on several rollers is used as suspensions. It is much easier, but more expensive, to purchase ready-made lighting fixtures "for retro" like ceiling lamps and chandeliers, and wall sconces.
- PHOTO: i.ytimg.com
- PHOTO: img01.cp.aliimg.com
- PHOTO: ae01.alicdn.com
- PHOTO: ae01.alicdn.com
- PHOTO: cs5.livemaster.ru
- PHOTO: cs5.livemaster.ru
DIY installation of open wiring in retro style
First of all, as in conventional electrical work, a plan is created for laying cables and the location of the main elements of electrical fittings.To do this, you need to have a large-scale apartment plan or a floor plan of a private house. It marks the locations of lighting fixtures, switches and sockets, taking into account the location of stationary electrical appliances and furniture.
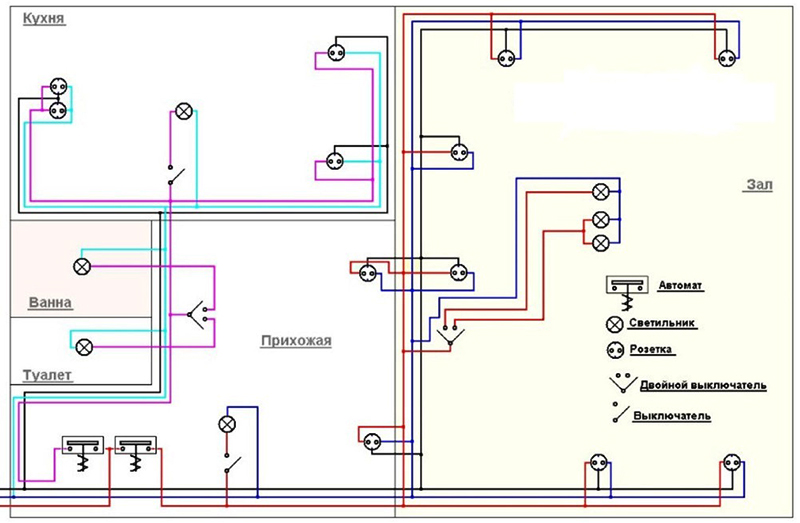
The layout of the external wiring in the apartment should take into account the location of the furniture
PHOTO: sovet-ingenera.com
Related article:
Calculation of the amount of retro cable for outdoor wiring
As a rule, the amount of cable is determined by the diagram. 10-15% is added to the received footage. However, the price per meter of retro wiring is very high, so it is more advisable to take measurements with a tape measure directly at the facility. To the resulting footage, add 10 cm to connect each switch and socket, 5 cm for the junction box and at least 15 cm for each lighting fixture.

Installation of retro wiring in a wooden house
DIY installation of retro wiring is carried out in the reverse order from peripheral devices to the junction boxes and further to the terminal blocks of the shield. There are special recommendations for laying outdoor wiring lines:
Design project of retro wiring in a wooden house and apartments with photos of interiors
Retro wiring is not only stylish, but also a technological alternative to traditional cable routing in cable ducts. As a rule, it is used in the interiors of Provence, grunge, loft, Victorian classic, vintage, modern.
Examples of using retro wiring in the interior:
- PHOTO: bossfor.org
- PHOTO: media2.24aul.ru
- PHOTO: 9dach.ru
- PHOTO: inde.io
- PHOTO: l-gallery.ru
- PHOTO: r-electro.ru
Retro wiring: reviews
Before making a choice in favor of such a wiring, you should carefully read the reviews of those who have already installed a similar electrical network in their home or apartment.
Retro wiring installation - price per work
The total cost of wiring, including installation, is much higher than that of conventional wiring. However, the lion's share of financial costs falls on the purchase of materials. The work itself, although it is not particularly difficult, should be carried out with special care, since the result will always be in sight. Here are some prices as of September 2019 obtained from a number of Internet resources at the request "Installation of retro wiring price Russia".
| Company | Installation work cost (as of October 2019), RUB | |||
|---|---|---|---|---|
| Sockets | Switches | Junction boxes | Wire laying | |
| "Two electricians" Moscow and Moscow region | 500 | 500 | 450 | 120 |
| "Home electrician" St. Petersburg | 300 | 300 | 500 | 130 |
| "ElectroDoka" Moscow and Moscow region | 300 | 300 | 400 | 150 |
| LLC "Normogrand" In Moscow and nearby regions | 300 | 300 | 450 | 100 |
Video: installation of retro wiring

Summing up
Retro wiring is a stylish element of the interior that emphasizes the individuality of your home. Its high cost can be somewhat reduced by doing some of the work yourself. However, in pursuit of economy, you should not use cheap and low-quality Chinese cables and accessories. In addition, the final check of the electrical network and its connection to the electrical panel should be entrusted to professionals.
If you liked our article, you found something useful here, take part in the discussion and recommend it to your friends.


