How to choose wall-hung toilet bowls with installation - expert advice
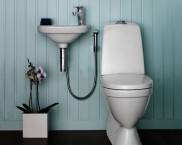
Havethe nitases mounted on the installation look aesthetically pleasing and modern. The owners give them preference not only for their beauty, but also for the fact that the built-in design significantly saves space in tight spaces. In terms of strength, they are not inferior to classic floor-standing models, but the installation of embedded systems is much more difficult. The answer to the question of how to choose wall-hung toilet bowls with installation, depends on the individual characteristics of the room.
The content of the article
Types of installation systems
The most common is a frame installation, which has a variable shape and can be adjusted both in height and in width. In addition, this type of structure is easily aligned with the floor and walls.
In addition to the classic installations that are attached to the load-bearing wall, there are shortened models that have a height of less than 90 cm. Such frames are installed mainly under a window or where the installation of standard structures is not possible.
After installing the installation and cladding, the toilet is hung up. The assembled metal structure is made of steel and has a very high strength, so even the most inexpensive models can withstand a weight of at least four hundred kilograms. Which one is better to choose a wall-hung toilet with installation is rather an aesthetic question. In terms of reliability, most modern models are not inferior to each other.
Selection criteria: pros and cons
Frame installations the most popular, since they have the following positive features:
- the ability to adjust the height of the toilet;
- the ability to independently determine the distance between the bearing wall and the frame using the length of the fastening studs;
- high strength of elements and connections;
- convenience of carrying out subsequent finishing works.
The obvious disadvantages include a certain complexity of installation, which requires precision and care from the master. The frame is attached to the floor and to the wall, therefore, during work, you should constantly check the level readings.
High-quality and more expensive models are equipped with an emergency drain function. Since the tank is built into the wall, in the event of automatic failure and overflow, the water contained in it is poured into the wall, which is fraught with major overhauls in the future.
Installation installation - 5 easy steps
Step # 1 - this is the dismantling of old plumbing, if it was installed. Together with the plumbing, you will have to remove all the external finishing of the load-bearing wall, because the frame must be attached directly to the base.
Step # 2 - frame assembly and markup. At this stage, it is necessary to fix the movable units, namely the studs for fastening to the wall, adjusting their length to the desired size. After that, the frame is attached to the wall and, using the level, is set strictly vertically. The horizontal line is adjusted using the height screws at the bottom of the structure. After that, the places for future holes are marked with a pencil.
Step # 3 - fixing the frame. Plastic dowels are inserted into the prepared holes. For strengthening, you can additionally add a little mounting glue. After that, the installation is fastened with bolts.
Step # 4 - water liner. Most models offer the possibility of both side and top connection of the water hose. Fastening is carried out using a brass pipe with a collet. No additional sealing or sealing is required at this stage.
Step # 5 - outlet of the sewer pipe. The sewer riser in most houses has either a front exit or an upper one. In order to connect the toilet system to the pipe, it is necessary to use additional elbows that are suitable in diameter to the outlet of the riser. After connecting to sewerage system completed, you should install plastic plugs in the pipes, and put on special protective covers on the mounting studs. These measures will prevent damage to the fastener during finishing work.
Toilet installation
Once the finish is complete, you can install the toilet. As in the case of the installation of the metal structure of the installation, the fitting is performed beforehand. The pipes that connect the toilet bowl and the sewer system are usually much longer than necessary. The manufacturer allows this discrepancy because the thickness of the finish layer is never known in advance. Excess length is revealed after fitting, after which the branch pipe is cut to the desired size. It is important to clean the cut with a file, giving it a tapered shape - this will achieve the most complete fit and a tight connection.
After adjustment, the toilet is attached to the wall. Each kit has a foam pad between the wall and the toilet, which softens friction and avoids chips and cracks in the future. Which is better to choose a hanging toilet and installation is an important question, however, the quality of installation work and the accuracy of the master are much more influential on the service life.
Installing and connecting the drain button
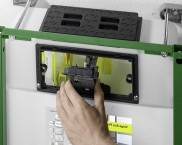
The last stage of work is to connect the drain button. During the production of finishing work, the assembly unit was closed with a special casing, which now needs to be carefully removed by cutting it off with a knife. Before connecting the button, you should make a test run by manually opening the tap in order to clean the system from accidentally trapped debris. Then you can connect the button to the system and install the decorative panel.
Pluses of built-in plumbing
The use of built-in plumbing allows you to create ergonomic interiorsin which the compressed space is used as efficiently as possible. How to choose wall-mounted wall-mounted toilets and install them in your apartment? To do this, you can carefully study this article, and for a more complete picture, watch a training video, for example, what is posted below:


