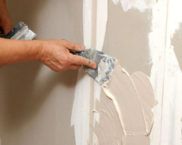
DIY textured plaster from ordinary putty
Dthe smooth surface of the wall can be attractive, therefore, in order to modify the room, you can make from ordinary putty textured... This contributes to less spending on special mixtures, as well as improving the appearance of an apartment or house. With the help of various tools, several variations of the structure can be made, so the owner of the premises is able to choose exactly what he likes.
The content of the article
Mix preparation
To prepare textured plaster from ordinary putty, you do not need to have the knowledge of a builder, it is enough to use the most common method. It consists in stirring 6 kg of dry gypsum mixture in two liters of water together with 200 grams of PVA. First, the gypsum powder must be stirred, and the glue is added only after it is dissolved in water. The result should be a homogeneous thick mass that can be used for any kind of texture applied to the walls.
Materials and tools
To create high-quality coverage, you must have:
- any putty;
- construction mixer;
- Master OK;
- putty knife;
- building level;
- sandpaper.
Created textured plaster from ordinary putty with your own hands using a mixer, as its use will help to better stir the solution and reduce the amount of time spent on work. You may also need other tools that are necessary for different types of putty application. But before starting work, it is worth preparing the surface. This is due to the fact that the remnants of the old coating can not only interfere with the application of a certain texture, but also worsen the adhesion of the material to the wall.
Preparatory stage
Before starting work, you must:
- Measure the area of the walls and calculate how much putty is needed for the entire surface. To create an attractive interior both gypsum and cement compositions are suitable.Moreover, they can be in buckets or in the form of a dry mixture. It is important to remember that in rooms where there is a high level of humidity, it is worth using cement-based compounds.
- Clean the surface from dirt, old plaster and construction dust. If this is not done, then the applied material may be unevenly distributed, which ultimately affects the appearance of the wall. All recesses should be covered with cement mortar in advance.
- Strengthen the wall. This is only necessary if the foundation is unreliable. To do this, you can use a plaster mesh, which is able to exclude the appearance of cracks.
You can also apply a thin coat of putty beforehand to prevent dark spots. The method of creating a decorative layer depends on how it will look.
Decorative plaster "rock"
This method of applying plaster is the simplest and therefore can be tried by those who are decorating an apartment for the first time. For this type of texture, it is not necessary to prepare a special mixture, it is enough to use standard plaster or cement options. It is best to use a ready-made solution, but it must be remembered that too loose compositions may not adhere well to the surface.
Application process:
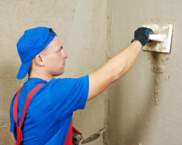
- First, you need to select an area on the wall equal to half one square meter and apply the composition with a trowel. The layer should be 2-3 mm thick. The higher this indicator is, the rougher the drawing will turn out.
- After that, it is enough to attach the trowel to the surface and, smoothly lifting its lower edge, make a downward movement. Small irregularities in the grout, smearing over the surface, will create a beautiful pattern similar to rock formation. To understand exactly how to make movements better is possible only in the process of activity.
- Further, the same actions are performed with the next section. To avoid gaps and irregularities, an overlap should be made on the previous coating.
After the work is done, it remains only to wait about a day until the putty is completely dry. To prevent excess mortar from spoiling the texture, it is necessary to constantly clean the float from the material.
Do you want to make your apartment truly unique? Read about DIY liquid wallpaper making and which can be applied by almost anyone.
Rain plaster
This wall decoration option is complex, but its appearance is more attractive. Typically, rain is applied at an angle, but the direction may vary. The process of creating an invoice is divided into several steps:
- Wall markings. This is necessary to ensure that all the "rain" lines are even. Masking tape is applied to each line drawn.
- Solution application. At this stage, the putty is smeared on the wall with a line, the length of which is one meter. The layer thickness must be at least 3 mm.
- Creation of structure. To make "drops" appear on the plaster, it is enough to press the trowel to it and peel it off. Such actions are repeated along the entire line.
After that, you can see that the textured plaster made from ordinary putty, created with your own hands, will rather resemble small needles. This is corrected by smoothing the surface in the direction of the outlined lines. The less the tool is pressed, the better the final effect will look.
During the work, it is important to ensure that there are no large differences between the created bands. Also, during work, one should not forget that after each line it is necessary to tear off the masking tape. This will help create smooth joints.
To give the textured plaster from ordinary putty a more attractive look, you can paint and varnish it. This will contribute not only to creating a beautiful interior, but also to protect the surface.
Video tutorial on making and applying textured plaster from ordinary putty with your own hands


