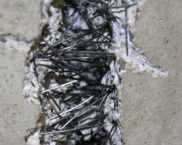
Tying reinforcement under the strip foundation: the subtleties of work
Reinforcement is a connecting element of any foundation. It is a reliable skeleton that holds concrete and gravel, keeping the building stable. It takes on all the main linear deforming stresses that arise not only from the mass of walls, floors, roofs of people and furniture, but also from temperature changes. Tying reinforcement under a strip foundation is a reliable way to create a rigid metal frame for a reinforced concrete structure. We will tell you how to correctly and inexpensively perform these works in this detailed material.
The content of the article
- 1 Features of the strip foundation
- 2 Strip foundation reinforcement scheme
- 3 Calculator for calculating the required amount of reinforcement for a strip foundation
- 4 Rebar knitting wire
- 5 Calculator for calculating the amount of knitting wire for reinforcing strip foundations
- 6 Rebar tying tools
- 7 Video: knitting reinforcement for a strip foundation
- 8 Summing up
Features of the strip foundation
The foundation of the tape type is the base of the building, monolithic along the entire perimeter and made from a mixture of concrete and gravel.
Technically, the arrangement of such a base is not difficult and does not require the use of special equipment, as is the case with tiled or pile foundation. Its only drawback is the high consumption of building materials and increased labor costs.
Fields of application of the base of the tape type:
- in buildings with a plinth and basement;
- for structures in which heavy reinforced concrete floors are provided;
- in buildings with brick and block walls with a density of more than one thousand three hundred kilograms per cubic meter;
- in areas with difficult soil, which prevents uniform shrinkage of the building base.
Advice! When choosing a site for construction, pay attention to the condition of the soil.Cracks indicate deep freezing and subsequent deformation of the soil, failures indicate the presence of underground sources washing out the soil.
When choosing a place to build a house, you should take a closer look at the houses located nearby. Their state will tell you possible problems and ways to solve them. If the foundations of the surrounding houses could not withstand the load and gave cracks, and the walls were crooked, refuse such a site for construction.

In the process of preparing the pit for the base of the house, the structure of the soil will become noticeable and all problem areas will be revealed
Advice! To reduce the level of freezing of the soil, builders use plates of insulation made of polystyrene or foam. They are laid on the bottom and walls of the trench before pouring. This method is especially effective for shallow foundations.
The main parameters of the soil that affect the strength of the foundation and are necessary for calculating its dimensions:
- soil composition;
- freezing level;
- ground water level;
- relief characteristics of the site.
Depending on the characteristics of the site, the type of foundation is selected. The lifespan of the foundation depends on the materials used by the builders. Monolithic foundations and rubble foundations can last for a century and a half, brick foundations will last only fifty years, and structures made of concrete slabs - three quarters of a century.
Monolithic structures are divided into two types:
- shallow - suitable for houses made of relatively light building materials. Wooden and frame structures can be installed on it. Suitable for areas with unstable soil and is usually selected for reasons of economy;
- recessed - necessary for buildings with concrete ceilings and strong walls. The arrangement of such a foundation is necessary if an underground garage or basement is planned. It is characterized by increased strength and requires capital investments.

For arranging a monolithic structure, no special equipment is required. One concrete mixer is enough
A monolithic base without reinforcement will not differ in strength and durability. Reinforcing frames give the concrete structure resistance to possible soil movements.
Related article:
DIY strip foundation: step by step instructions. In the article, we will consider the pros and cons of this foundation, the nuances of its correct pouring, as well as what brand of concrete is best to choose in order to get a high-quality structure.
Strip foundation reinforcement scheme
Reinforcement cage transforms a concrete structure into reinforced concrete. Its characteristics differ significantly. Whereas conventional concrete only resists compressive loads, reinforced concrete actively resists tension and fracture.
Note! The strongest effect of stretching is on the bottom of the base of the house, and compression is on the top. To increase strength, it is necessary to use a reinforcement frame covering the entire foundation.

Reinforcement calculation provides not only a guarantee of structural strength, but also significant material savings
Calculation example:
The foundation with dimensions in meters: 15 (length) x10 (width) x0.8 (height) x 0.3 (thickness). The perimeter of the structure will be (15 + 10) x 2 total 50 meters. To calculate the required amount of reinforcement, you should imagine its location in the foundation. The best choice would be to place four framing bars around the entire perimeter. We multiply our perimeter of 50 meters by the number of metal reinforcing strips - we get the required two hundred meters of reinforcement. To this result should be added about twenty percent for overlaps, for a total of 240 meters.
Next, you need to calculate the vertical parts of the reinforcement base.The reinforcement knitting diagram indicates that two vertical and two horizontal rows of short rods are required. The distance between them should be at least half a meter. Again, take the perimeter, 50 meters, and multiply by 4 - this will be the total length of the area of the vertical and horizontal bars. We get 200. Divide by 0.5 meters (the distance between the bars) = 400. For horizontal bars you need 30 centimeters of reinforcement, vertical bars - 80 centimeters (the parameters of our foundation, height and thickness). We need 200 vertical and the same number of horizontal rods. 0.8 x 200 = 160 meters and 0.3 x 200 = 60 meters. 160 + 60 = 220 + 20% = 264 meters will be spent on vertical and transverse rods.
To facilitate the task of calculating the required consumption of reinforcement for different frame options, use the calculator below:
Note! The distance between the rods and the thickness of the reinforcement are regulated by building rules approved by SNiP number 52.01.2003. It contains all the features of the technology for the construction of concrete and reinforced concrete structures.
The reinforcement knitting scheme is quite simple. The connection of parts can be carried out using a knitting wire and a construction hook, which are not difficult to make yourself. To facilitate the process, you can buy a special gun.
Rebar knitting wire
Binding wire is made from steel. The molten material is passed through a narrow slot of the rolling device and a long, thin material is obtained, which, after annealing, retains its elasticity. This process is regulated by GOST 3282 74.

The finished material is subdivided into grades depending on the type of metal and the method of firing, final processing and technical characteristics.
Steel wire classification:
- By type of coating: uncoated marked "C" (light) or "H" - black and coated with zinc or elastic polymer.
- By the level of processing: two classes 1C and 2C.
- By profile: round and periodic.
- Sectional shape: round, square, oval, polygonal.
- For hardware: with normal and increased accuracy.

Knitting wire is used in a wide variety of industries: mechanical engineering, construction, industrial production
What wire to knit reinforcement? For private construction, a section of 1.2 mm is usually used. This material is considered easy to use and durable enough.
Note! The heat-annealed material is resistant to tensile stresses.
Hardware up to 0.8 millimeters in size is suitable only for fastening horizontal reinforcement rods, and for vertical rods, choose a material with a cross section of 0.8 or 2 millimeters.

It is important to remember that the thicker the bond material, the harder it is to make a fixed knot out of it.
Note!Wire with a cross section of three and four millimeters is used in situations where high resistance to aggressive external influences is required.Its galvanized coating in several layers allows the material to be used even in an active chemical environment.
The connection of reinforcement by wire tying is considered one of the most reliable methods of fixing. The advantages of this method:
- extremely strong hold;
- low material cost;
- economical consumption;
- optimal speed of work;
- ease of use.
Important! The strength of the strip foundation directly depends on how rigidly the knots of the knitting wire are fixed.

Steel wire retains its strength properties for a long time and is resistant to the influence of adverse external factors
Before proceeding with the arrangement of the foundation, it is necessary to calculate not only the reinforcement, but also the knitting material. For 1 ton of reinforcing cage, an average of up to fifteen kilograms of wire will be required. Consumption per 1 ton of reinforcement depends on the following factors:
- the size and type of foundation;
- on how many nodes there will be;
- from the diameter of the knitting material;
- from the method of attachment.
To make a more accurate calculation, count the number of joints.

For economical consumption of materials, experts recommend knitting the mesh of the reinforcing cage in a checkerboard pattern. In this case, the last rows of each wall are fixed at each point
Note! Each connection will require a wire thirty diameters of the reinforcement being fastened. For example, for a cross section of twelve millimeters, at least 36 centimeters of wire will be required.
In order not to face an acute shortage of material, it is recommended to purchase it with a margin of one and a half to two times.
The price per kg of wire ranges from 30 to 60 rubles, depending on the diameter and quality of the material. Accordingly, the price for a bay weighing 5 kilograms will be approximately 200 - 300 rubles. In such a bay there are about 500 meters of wire. For the convenience of customers, many manufacturers offer various electronic calculators for a more accurate calculation of material consumption.
Calculator for calculating the amount of wire for tying the reinforcing cage of a strip foundation
We suggest calculating the optimal length of a piece of wire for your design:
When the calculator is running, the following are taken into account:
- sectional area of the concrete base;
- diameter of reinforcement rods (not less than 12 millimeters);
- the distance between the rods (they are located at the same pitch).
Important! It should be remembered that to strengthen the foundation at the corners of the building, one and a half to two times more knitting wire will be required than to fix the joints on the longitudinal walls.
It should be borne in mind that the result obtained is the minimum required amount of material. It is worth buying one and a half to two times more. In the process of work, segments will remain, but they will always come in handy on the farm.
Rebar tying tools
How to knit reinforcement correctly? This can be done in different techniques and using special tools, which should be discussed in more detail. So, what are the tools:
| Picture | Tool |
|---|---|
 | Prefabricated hook |
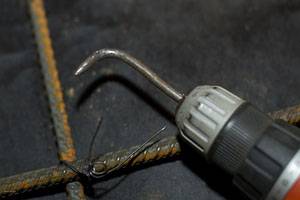 | Homemade hook |
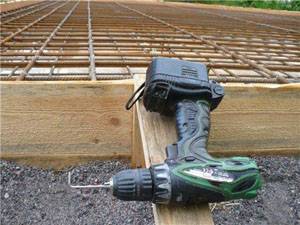 | Screwdriver with attachment |
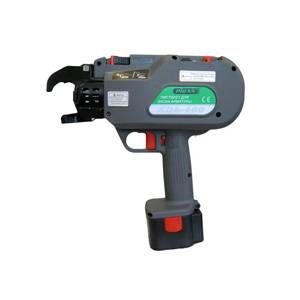 | Special pistol |
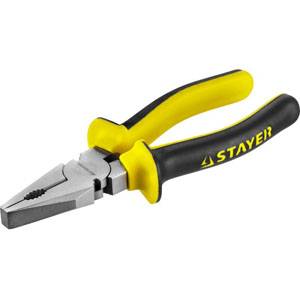 | Pliers |
To create workpieces in the form of a clamp, a special rebar bending machine is required. It can be made with your own hands from materials that are always available at a construction site. More details on how to make such a machine in the following video:
In principle, you can buy a similar design at a hardware store, but is it worth it to spend if it is hardly useful anymore? In addition, small-sized factory structures are not strong enough and often fail before the necessary work is completed.
On the other hand, electrical appliances of this type significantly save time and effort; they can be used to create the most complex patterns from fittings, which are then used in the design of fences and gates. So decide for yourself: how important such an operation is for you and which machine will be the best option for your construction site.
Knitting gun for fittings
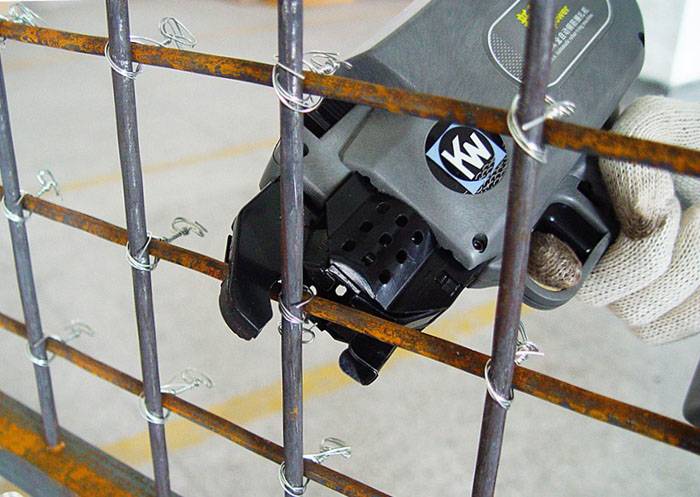
Frame tying guns are perhaps one of the simplest and most convenient tools to work with. With its help, one node will take only a couple of seconds. Its only, but significant disadvantage is the high price, which is not very affordable for a private developer. Such devices are used in construction organizations mastering large volumes of foundation work. The prices for the tool start at thirty thousand rubles.
Pistols are used:
- when forming a mesh for filling floors:
- for binding the metal frame of the foundation;
- in the manufacture of metal products from fittings for various purposes.
The device consists of a powerful electric motor with a rechargeable battery. The motor turns the spools to guide the wire to the desired turn.
The knife built into the gun cuts the wire at the right moment and then the twisting mechanism firmly fixes its ends. The whole work takes a few seconds.
For comparison! It will take an experienced welder about five seconds to tack the reinforcement joint. The knitting gun does this job in a maximum of one and a half seconds. At the same time, the strength of the connected nodes is in no way inferior to welding.
At this speed of work, the tool does not need a power source and does not require any special operator qualifications.
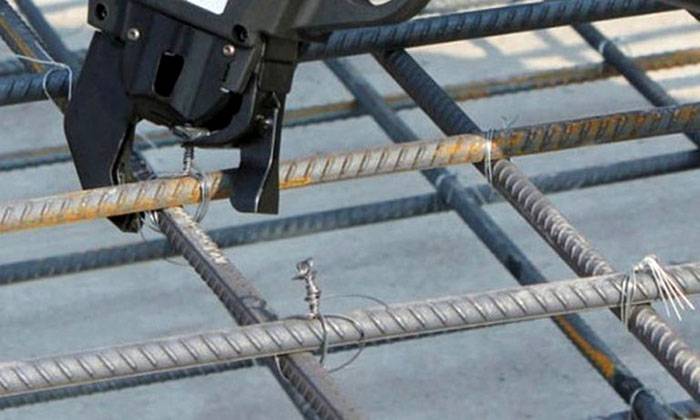
For greater reliability of the connection of the reinforcement parts, the tightening force can be adjusted on the tool
The wire for the gun is selected with a diameter of 0.8 to 1.5 millimeters. The reel of the pistol holds from fifty to one hundred meters of wire. You can tie about two hundred knots from one coil.
Important! The gun is designed for calibrated wire. Poor quality material can damage the tool.
Special attachments for the tool allow you to tie knots even at a distance, without any additional effort.
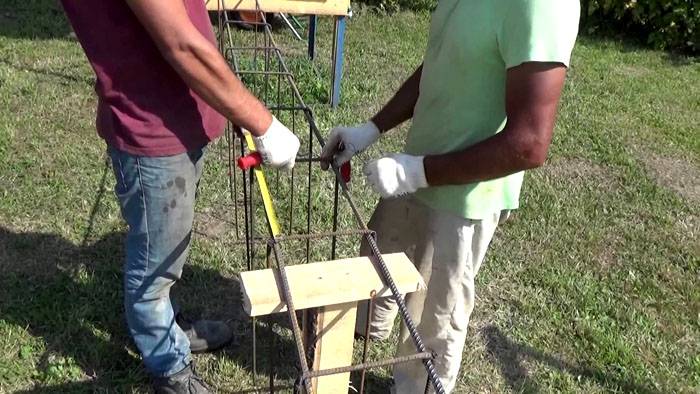
Rebar knitting hook
A crochet hook is the most primitive tool for working with reinforcement. It is made from a metal rod and a hook. The handle has a curved shape for easier gripping of the wire and an integrated bearing that speeds up the rotation.
There is a more advanced version - a screw hook. This semi-automatic hook has a triple worm gear which greatly increases the working speed.
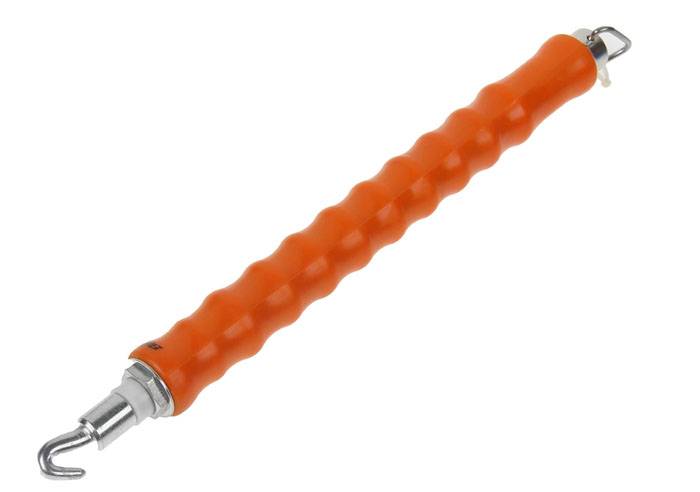
These tools are commercially available, but they cost an order of magnitude more than conventional hooks. It makes sense to purchase them if a large amount of work is planned.
Algorithm for tightening the knot with a hook:
- a wire forty centimeters long is cut from the bay;
- a piece of wire is bent in half and laid at the junction of the reinforcement bars;
- the hook grabs the end of the wire and twists it with the other end;
- the rotation is repeated several times until a firm connection is obtained.
Important! Wire loops should not be overly tightened. This can cause the assembly to break.
The procedure for working with a screw hook is the same with the difference that instead of a rotary reception, the handle of the device must be pulled towards you. At the joints of the reinforcement segments at the corners of the foundation, the wire is wrapped around several times and then tightened the knot until a strong adhesion is obtained.
You can make a knitting tool with your own hands. Here is the most suitable drawing:
Another option for an automatic homemade knitting device is a screwdriver with a nozzle. You can make this attachment from a regular nail by bending it into a hook. In this case, you need to adjust the speed of the tool so that it does not tear the wire. In principle, you can use an electric drill for these purposes, but, again, monitor the speed of rotation of the hook.
The video describes in detail how to make the simplest tool for tying reinforcement:
A few tips:
- it is recommended to use a low-carbon material for the reinforcement bond. If it does not bend well, you can burn the wire and cool it;
- do not use a wire with a diameter of more than one and a half millimeters for hand knitting, you will spend too much effort.
Otherwise, the knitting process is not difficult, especially if you use a spring-loaded hook.
Video: knitting reinforcement for a strip foundation
The technology of knitting reinforcement for the foundation will not cause difficulties even for an inexperienced master. Learn more about the correct sequence of actions in the following video:
Note! The frame for pouring with concrete is best made of metal protected from corrosion by a special coating.
Working with metal reinforcement
Why not use electric welding for the reinforcement cage under the foundation? There are several good reasons:
- the metal of the reinforcing bars overheats during the work. High carbon steel loses half of its strength after being welded. This fact is especially important when forming corners, it is there that all the disadvantages of this method most often appear;
- with a rigid method of fixing the support rods, the load on the frame is unevenly distributed. Abnormal tension arises in places of rigid coupling;
- in case of an error in the assembly, you will have to buy the material again, since it will already be impossible to change anything;
- welding work requires high costs to attract specialists (not everyone can do such work with their own hands) and pay for electricity.
In what cases you can not do without welding:
- If there are embedded elements in the foundation. These parts are installed in places where the greatest load on the concrete layer is predicted. These elements are welded to the main reinforcement skeleton to distribute the load evenly.
- For securing longitudinal joints. In places where the reinforcement overlaps, a double layer is obtained during knitting. It is connected by welding. The butt of the whip is not connected, the sections of the reinforcing bars are not enough for a sufficiently strong adhesion.
So it turns out that, whatever one may say, but better than a method of tying reinforcement at intersections using knitting wire, tightening clamps or steel mounting brackets has not yet been invented.
Important! The reinforcement skeleton must be placed in the concrete. To prevent the frame from pressing against the formwork material, use small clamps. They will help maintain the optimal distance - about 50 mm to the pouring surface.
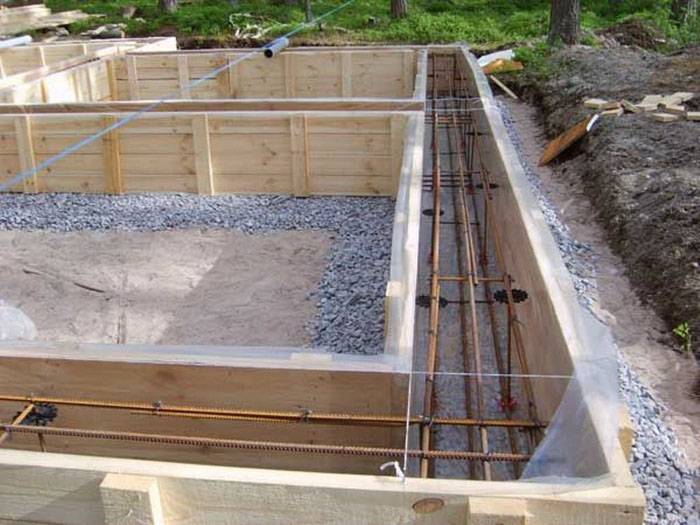
Before assembling the reinforcing base, it is necessary to install the formwork walls. A layer of waterproofing is laid at the bottom of the trench to protect the metal from the effects of groundwater
Note! For the frame of different construction elements, a different knot tying step is used.
| An object | Number of cells | Distance between nodes, cm |
|---|---|---|
| Concrete floor slab | 2 by 2 | 10-16 |
| Walls | 2 by 2 | 10-16 |
| Column | 2 by 2 | 10-16 |
| Blind area | 3 by 3 | 15-25 |
We have already examined in detail the process of crocheting reinforcement with a knitting wire. Many people ask whether it is possible to knit reinforcement with plastic clamps?
Opinions differ. Some experts note that plastic does not withstand the process of moving the structure. That is, if the frame for the foundation is formed not directly in the trench, but somewhere to the side and then using lifting equipment is installed in the finished trench, then, of course, the plastic may not withstand such a procedure. On the other hand, the rolling process is much easier and, moreover, does not require any special tools. The loops can be knitted by hand or using a special hose clamp gun.
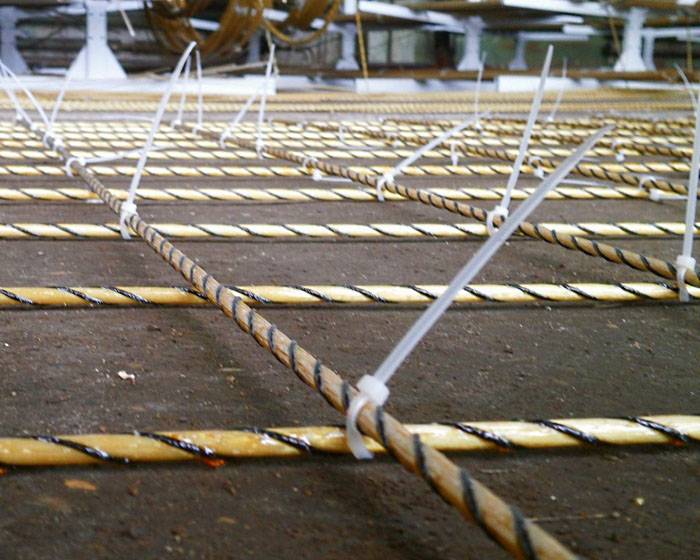
In the thickness of concrete, plastic inserts feel great. They are non-corrosive and flexible enough to withstand all necessary loads
For knitting reinforcement, you need to carefully select the clamps. Polyamide screeds are considered the best; they can withstand temperature extremes from minus forty to plus eighty degrees. To check the suitability of the screed, it should be folded in half. If it is cracked at the fold, it will not work.Financially, screed costs will be higher than wire costs.
Knitting of fiberglass reinforcement
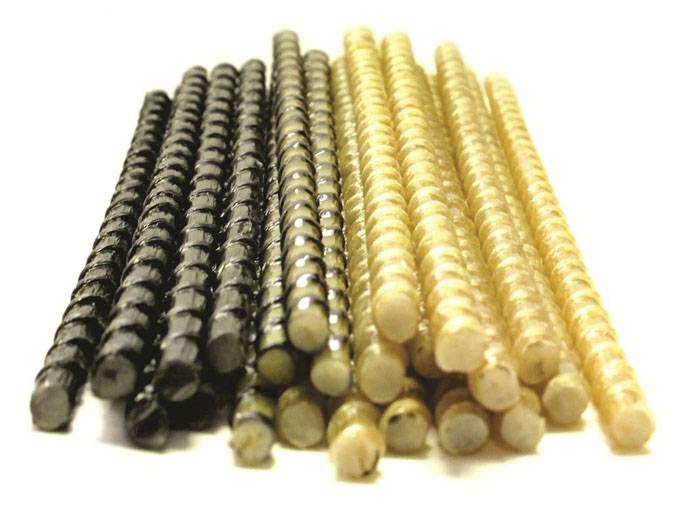
Separately, it is worth talking about the knitting of fiberglass reinforcement for strip foundations. This composite reinforcing material was developed back in the sixties of the last century and was used mainly in the construction of facilities located in regions with harsh climatic conditions. With the development of technology, the cost of plastic fittings has become available to the mass developer.
Types of composite reinforcement:
- ASK - glass composite;
- AUK - carbon composite;
- AKK - combined.
The advantages of polymer rods
| pros | Description |
|---|---|
| Corrosion resistance | This material is not susceptible to weather and chemical attack. |
| Low thermal conductivity | Does not form cold bridges even in severe frosts. |
| Lack of electrical conductivity | Does not interfere with the passage of radio waves and does not conduct current. |
| Light weight | Polymer rods are eight times lighter than metal ones. |
| High strength | In terms of tensile strength, plastic reinforcement is two to three times superior to metal. |
| No longitudinal seams | The plastic rod is sold in coils of one hundred and fifty meters. You can save a lot on the absence of scraps. |
| Ease of installation | No special tools are needed to knit a plastic reinforcement cage. |
| Ease of transportation | A bay of plastic fittings weighs only about ten kilograms and fits easily into the trunk of a car. |
disadvantages
| Minuses | Description |
|---|---|
| The cost | The price of a plastic rod is about one and a half times higher than that of a metal one. |
| Low fracture strength | Compared to its metal counterpart, plastic is a rather fragile material and breaks easily. |
Important! Fiberglass reinforcement cannot be used for floors and load-bearing structures.
Conventional knitting wire and plastic fasteners can be used to hold the composite rods together. For the manufacture of the lower reinforcing belt, it is better to use steel or aluminum wire. In order to strengthen the fiberglass frame in places of increased load on the foundation, metal and composite reinforcement should be combined.
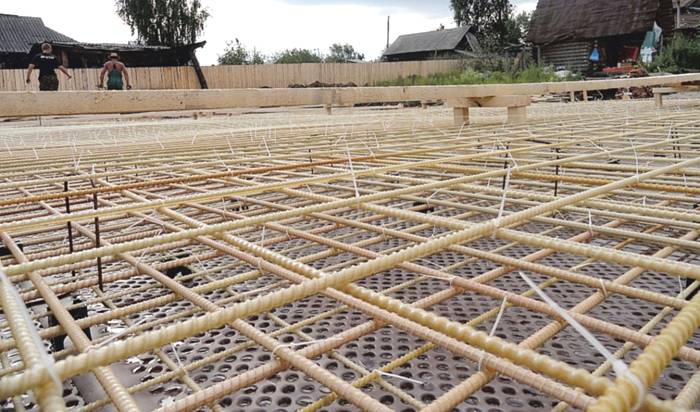
Otherwise, working with a composite material does not differ from the formation of a metal frame. The distances between the rods and the principle of knitting are the same
Related article:
How to create high-quality concrete mixtures: a table of the proportion of concrete per 1m3. In the article, we will tell you in detail what components are needed and how to mix them correctly in order to get high-quality material.
Summing up
So, the most important points that you should know before proceeding with the formation of the reinforcing frame of the foundation:
- It is better to tie the reinforcement using mild steel wire.
- Fastening with steel wire is considered the most reliable type of fastening and in many respects surpasses fastening by welding and plastic clamps.
- The reinforcing frame should be recessed into the thickness of the foundation when pouring at least five centimeters, this will save the metal from the adverse effects of the external environment.
Good luck with your construction!


